


-
Assembling
-
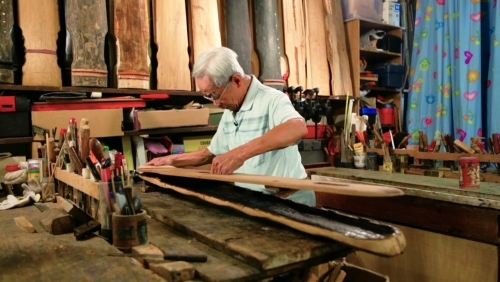
Step 5: Assembling
The chopped and hollowed top board and bottom board can be held together with a mixture of raw lacquer and flour, or with animal gum. After the boards have adhered to each other, a linen cloth can be glued onto and wrapped around the qin body, using an evenly applied layer of a mixture of raw lacquer and flour. This helps tightening the qin body and prevents the lacquer on the qin top from warping and cracking. Another way of assembly is to use bamboo nails to hold the top and bottom boards together at the corners of the forehead, the shoulders, the wings, the waist and the tail. The bamboo nails are inserted from the bottom upward. No adhesive is involved with this method.
-
Step 5: Assembling
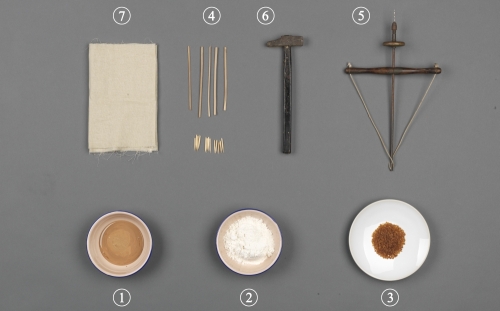
Tools and materials
- Raw lacquer – to be mixed with flour to form an adhesive
- Flour – to be mixed with raw lacquer to form an adhesive
- Animal gum – to be melted in a double boiler and used as an adhesive
- Bamboo nails – made of old bamboo, each nail is about 2-3cm long. They are used to hold together the boards of a qin. They do not rust like metal ones in humid weather, and will not hurt the qin body.
- Drill – holes are first drilled on the qin bottom at suitable positions and then the bamboo nails are inserted into the holes. This prevents the bamboo nails from breaking off.
- Hammer – used for hitting the nails into the qin body
- Linen cloth – used for tightening the qin body, as well as for preventing the lacquer on the qin top from warping and cracking
-
Step 5: Assembling
A qin body with its top and bottom boards glued together
Maker: Poon Tak-lun (apprenticeship began in 1993)
Maker’s note: Learning to play the qin is already a difficult task, let alone mastering it. Commensurately, the art of qin making is probably one of the most difficult crafts in existence today. Master Choi Chang-sau began transmitting his qin making skills to students twenty years ago, and we were all very excited. It has been a pity that I have been always extremely busy at work and have yet to complete a single qin, with the most important lacquering stage waiting to be finished. As I learnt to make the qin, I have also acquired knowledge about material selection, qin shapes, and other aspects of the process. Many seemingly simple operations, such as drilling the string holes and threading the tuning tassels are in fact quite difficult. This qin is relatively small, and the resonance cavity belly is not large enough, meaning it will probably only produce sounds of a low volume. I am very anxious to complete this qin as quickly as possible, so that I can play with my teacher and my friends.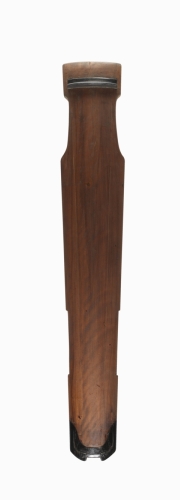
-
Step 5: Assembling
A qin body wrapped in linen cloth
Maker: Choi Chang-sau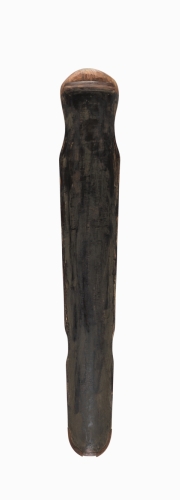
-